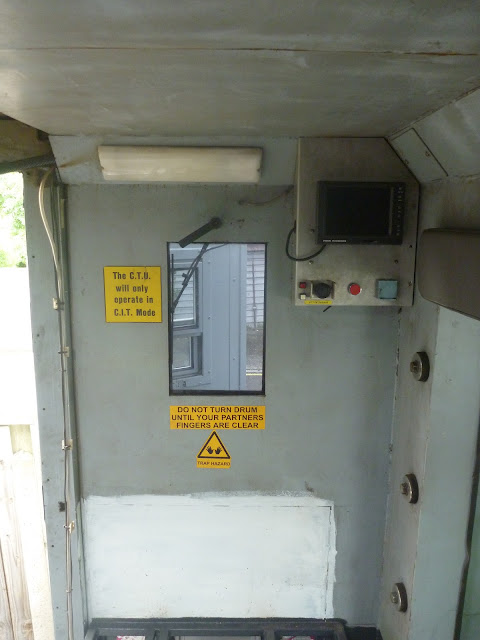
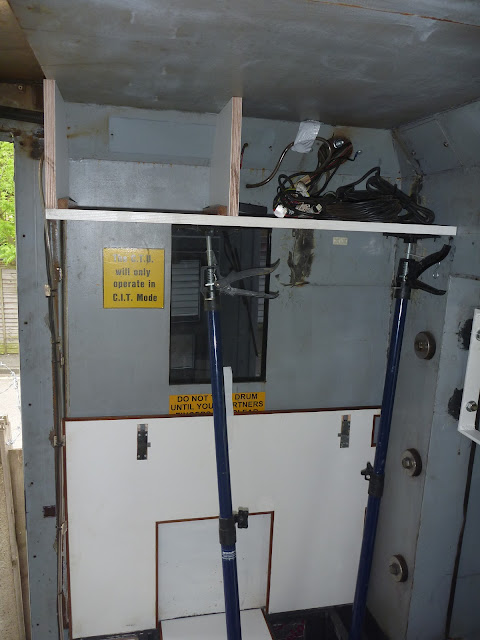
A small job that I completed a few days ago was the insulation and cladding of the side door.
The insulation in Jim is pretty weak generally; there are cold bridges everywhere and the fibreglass insulation that the original coachbuilder fitted between the inner and outer skins has sagged to the bottom of the walls. Nevertheless, the 18mm plywood/GRP doors are an obvious weak point as far the insulation goes. I am pretty much resigned to having to run the heating continuously in cold weather, but there is no point passing opportunities to improve the insulation where I can, and so I decided to add 50mm of Celotex to the doors to make them less likely to leak heat.
I started by battening out the side door to 50mm, to hold the insulation in place and hide the edges of the insulation board. This part took the longest as I had to box around the window, door handle, and night latch, and cut recesses for the three lock bolts, and the mechanism tube. I held the 50mm strips of plywood in place using angle brackets screwed into the door, and more Sikaflex 221.
With the door boxed out to a depth of 50mm, I fitted a quadrant trim around all edges.
Wednesday 19 June 2013
Monday 10 June 2013
Over-Seat Console
The next job on my list was to build a console unit to reside over the nearside bench seat that I recently finished. The area that I intended to fit it in was filled with an ugly aluminium box that was left over from Jim's previous life, but it housed the controller and one of the monitors for the reversing and side cameras, and so the new console had to accommodate these too. The photo below shows the area before I started work.
The first job was to remove the existing box. Taking the box off the wall was a fairly quick process, just requiring the removal of eight M6 security bolts (used throughout the truck), but this left me with two pieces of steel angle which supported the box. Drilling the steel at the front of the truck is almost impossible and so, like me, the coachbuilders had taken the easy route of welding the steel supports to the walls. With all of the cables for the cameras running so close, and with both supports being close to the corner, wielding an angle grinder was difficult. I managed to grind most of the welds back, but I still had to spend more than an hour delicately manoeuvring a four foot long crowbar and 4 lb lump hammer getting the steel off the wall. This will probably be the last bit of demolition I have to do in Jim and so there some satisfaction when I had cleaned off the welds and prepared the wall for something prettier.
As you can see on the photo, there is an angled section where both walls meet the ceiling, making a simple box design out of the question. The angled section was fitted by the original coachbuilder to run the cables for the lighting and security equipment, and has now been repurposed by me to run additional cables for high level equipment. Sadly the angled section was not fitted at 45 degrees (actually closer to 50/40), which shouldn't really have surprised me, given that the walls aren't perpendicular to each other, and the walls and ceiling aren't square. The console will largely be held in place with Sikaflex, and so I needed a close fit to all surfaces, this made building the frame for the console a slow process.

At each stage of the build, the console was offered up to the wall and template was made of the next piece, this was the cut and trial fitted, and if it worked, the console was then taken back to the bench and the new piece was fitted. When the bulk of the frame had been built, I could then start preparing the three sections for the respective purposes: the left compartment being for storage, the centre housing the monitor and video controller, and the right being for a new CD/Radio headunit.

The first job was to remove the existing box. Taking the box off the wall was a fairly quick process, just requiring the removal of eight M6 security bolts (used throughout the truck), but this left me with two pieces of steel angle which supported the box. Drilling the steel at the front of the truck is almost impossible and so, like me, the coachbuilders had taken the easy route of welding the steel supports to the walls. With all of the cables for the cameras running so close, and with both supports being close to the corner, wielding an angle grinder was difficult. I managed to grind most of the welds back, but I still had to spend more than an hour delicately manoeuvring a four foot long crowbar and 4 lb lump hammer getting the steel off the wall. This will probably be the last bit of demolition I have to do in Jim and so there some satisfaction when I had cleaned off the welds and prepared the wall for something prettier.
As you can see on the photo, there is an angled section where both walls meet the ceiling, making a simple box design out of the question. The angled section was fitted by the original coachbuilder to run the cables for the lighting and security equipment, and has now been repurposed by me to run additional cables for high level equipment. Sadly the angled section was not fitted at 45 degrees (actually closer to 50/40), which shouldn't really have surprised me, given that the walls aren't perpendicular to each other, and the walls and ceiling aren't square. The console will largely be held in place with Sikaflex, and so I needed a close fit to all surfaces, this made building the frame for the console a slow process.

At each stage of the build, the console was offered up to the wall and template was made of the next piece, this was the cut and trial fitted, and if it worked, the console was then taken back to the bench and the new piece was fitted. When the bulk of the frame had been built, I could then start preparing the three sections for the respective purposes: the left compartment being for storage, the centre housing the monitor and video controller, and the right being for a new CD/Radio headunit.

Monday 3 June 2013
Unemployment... Not as Relaxing as One Might Expect
Blogging has been a bit scant lately, but that is due to change as I am now employed full time in the services of His Majesty Jim. Working on Jim in the evenings and weekends outside of the 9-5 of a full-time job, was tiring and fairly unproductive. It's difficult to get stuck into a job when you only get a couple of hours at a time to work on it, and so when I handed in my notice at work, I immediately lost motivation to work on Jim. I found it hard to summon any enthusiasm, knowing that working every free minute of my time would only gain me the equivalent of a few days full-time work. Consequently, not much has been achieved on Jim in the last 4 or 5 months, except for during the last few days.
It's been over a week since I became unemployed, and not one morning has started with a special brew or a trip to the betting shop. In fact, I have been starting work earlier and finishing later than I did previously, such is the burden of being supported by a generous but growingly impatient spouse.
The first job I started,was to finish populating the roof rack. Some time ago I finished installing the last three of the BLD 100w solar panels. I now have 800w of solar panels, wired through a morningstar MPPT regulator into a 540ah 24v Rolls Surrette battery bank. The batteries are on their last legs and so at the moment, the solar is simply preventing the self discharge from flattening the bank.
Having finished fitting the solar panels, I was left with a significant portion of the roof which remained to be covered. Having spent many mornings waking up in a hot tent with the ground sheet stuck to my sweaty face, and feeling like a dehydrated elephant had been urinating in my mouth, I have always been keen to try to keep the internal temperature down as much as possible in hot climates. One of of the ways I have planned to do this is to use a tropical roof the shade Jim's aluminium roof. To ensure that the tropical roof works as effectively as possible in keeping the internal temperature down, I have always planned to cover the full surface of Jim's roof, with the exception of the hatches which are needed to ventilate the inside and provide light.
Subscribe to:
Posts (Atom)


