With that in mind, one of the first major thing pieces of work I did on the inside of Jim was to install the bathroom. However, given that I might only use the room once or twice a day, I was loath to make it any bigger than absolutely necessary, and set about planning it to make it as small as possible, whilst still being usable.
Below is the space I started with, after installation of a window to add some light, and the hatch to allow me to empty the toilet without having to drag the excrement filled cassette through the living space, which would be a step to far even by my low standards of hygiene.

With this in mind, I designed the room around the footprint of a Thetford cassette toilet and matching shower tray, designed for use in small caravans. In addition to these items, the room needed to house, a sink, a storage cabinet, a radiator, and a shower; all in a space noticeably smaller than the cupboards I use at home to keep my clothes in. Which is why I thought that Water Closet was a surprisingly appropriate name, although my closets at home are significantly larger than the space I had allowed in Jim to shower, shave and sh...
I ordered a flip-down sink, mirrored storage cabinet and moulded shower tray, designed to mate together perfectly and fit with the 670mm width of the Thetford bench toilet. I ordered the parts partly to save me the hassle of having to build or fibreglass the parts myself, and partly because the idea of waterproof wipe down plastic appealed to me.
I started the build of the bathroom off by building a partition wall across the narrow dimension of the room, on which the toilet, sink and cabinet would attach. I have used thinwall 25mm box section steel for other areas of the truck and so I continued using this. It is fairly lightweight and and means that I can use thinner cladding materials as I am not relying on the plywood for any structural strength.
Without having somewhere perfectly level to park Jim, it is not possible for me to use a spirit level to get everything square and level. Consequently, I had to measure carefully to ensure the partition wall was parallel or perpendicular to the floor and walls. I built a large square out of lengths of steel to help me, and in the process learnt how easy it is to warp thinwall steel and bring things out of square when heat is applied!
The toilet is designed to be mounted flush against a wall (as the instructions tell you), this is so that you can screw the back of the toilet into the wall to keep it in place (what the instruction forget to mention) and prevent it twisting or rolling forward under use. Unfortunately, to allow the front of the flip-down sink to sit flush with the back of the toilet, it needs a space of 20cm or so behind it for the taps and waste plumbing, and so I had to build a small extension to the wall at the bottom, to which the toilet could attach.
With this wall finished, I temporarily removed it, and started lining the long wall against which I was building the bathroom. I used 6.5mm birch plywood for this, making templates of each of the lining panels using a new technique I learnt from Tim Zim's excellent blog when was converting an old trawler into a houseboat.
I used strips of hardboard cut to approximately 40mm wide, I held them in place with gaffa tape and glued them all together with a glue gun. This provided a perfect template of the panels to be made, which can then be transferred to the final material for cutting.
This template took less than 5 minutes to make and the panel was perfect first time, despite having no square edges and two internal cutouts. Some of the later panels required small adjustments but this technique has been a complete revelation to me and has massively sped up this kind of work. I guess it has been used by many generations of boatbuilders, but for someone like me who learns as they go along, it was a huge help.
Before I fitted the panel I cut out, I lined the apertures around the window and the toilet hatch to hide the void between the inner skin and outer skin of Jim's walls.
I then glued the panel in place using Sikaflex 221, holding it in place with drylining props whilst the sika dried. Sikaflex 221 is Sika's general purpose adhesive sealant. It bonds almost anything to anything, and for easy to bond surfaces like wood, very little preparation is needed. The reason I use 221 or equivalent products, is that it remains flexible. There are numerous adhesives that would join a sheet of plywood to the aluminium internal wall of Jim, but most of them dry to strong but brittle bond. If the wall were to twist slightly, the bond might crack, leaving the sheet detached and free to flap around like a badly performed Rolf Harris impersonation. I only wish for applications like this, Sika were able to make a trowel on version of the product. For a panel like this I used 2-3 tubes of the stuff; even buying in bulk, it is expensive, and without a pneumatic applicator, my hand begins to ache badly (despite my regular and rigorous wrist exercises).
The next job was to line the wall facing the sink and toilet. This wall was to accomodate the shower and radiator, and so I used some timber to space the lining pannels away from the wall enough to fit the pipework in. The timber was spaced to ensure that the radiator brackets would have some timber to attach to, and that there was sufficient room for all pipe runs. I gave the softwood timber a couple of coats of epoxy resin prior to being installed, to prevent it rotting in the damp air behind the shower.
You can see where I have run the cables for the bathroom light and external switch. Jim came fitted with lights along each side, one of which was perfectly positioned for the bathroom; however the light was not IP rated for use in a wet environment, and I am keen to replace all of the power hungry 8w fluorecent lights with modern LED lighting. Experiments with the LED light I bought to replace the original light showed that it was too bright to be fitted to the angled panel in the top corner of the room, where it could shine directly into your eyes.
With the pipework and wiring installed, I cut out and (temporarily) fitted a panel to box the void space in. The photos below show the accuracy of the template method described previously.
With three of the four walls now ready, I began to install the toilet and shower tray.
Throughout the work I have done on Jim so far, I have taken pains to avoid using equipment or construction techniques used in caravans; something which I was reminded of immediately on opening the box of flimsy plastic which arrived from a caravan/motorhome parts supplier, with the equipment I had ordered for the bathroom.
I have tried to avoid caravan components, partly because they tend to look like they were designed in the 70s by someone with dated taste, and partly because the primary aim of caravan equipment is to be as light as possible, whilst just about being able to avoid breaking catastrophically during the 4 days a year the caravan might be used. This design ethic does not translate well for use in vehicle which will bounce around on shite roads for several years, and will be used several times a day, full-time. Although even ignoring the differences in intended use, I was totally bowled over by quite how shambolically atrocious some of the parts were.
The appearance was acceptable, although the designer clearly hadn't looked at a home furnishing magazine for a few milenia, but the quality was on a par with the plastic packaging most yoghurts come in. The toilet was an exception, being made of thicker material, but even amongst the rest of the flimsy crap I had paid too much for, the shower tray was remarkable by it uselessness. There was not the smallest hope that it would survive an encounter with my moderate frame, and consequently I had to spend several hours reinforcing the tray in every dimension with plywood. This job was made harder, by the fact that Sikaflex 221, which bonds pretty much anything you can touch or smell, refused to stick to the plastic. After several experiments, I worked out that wiping the plastic down with Sika 205 cleaner, and priming it with 210 activator, allows the 221 to form a reasonable bond.
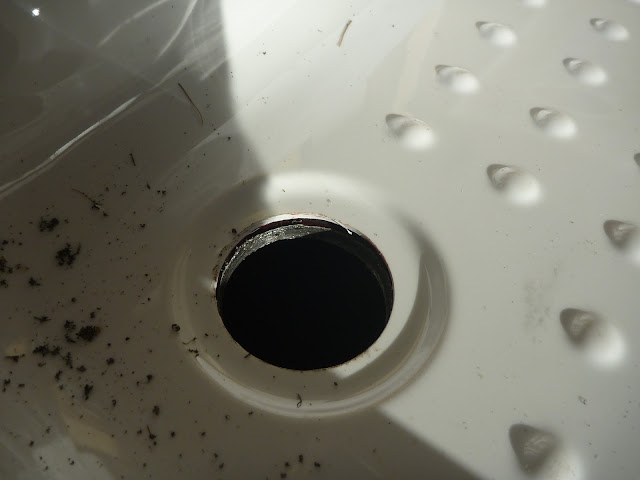
Given the meagre dimensions of the bathroom, I was forced to run the pipework to the shower and radiator down the corners of the shower tray. Boxing the shower tray in as shown above, meant that I had to run the pipework through at this stage, as trying to aim a flexible pipe into a small hole without being able to see it would have posed the kind of logistical issues only encountered by lovestruck drunks.
The shower tray was then installed in-situ, bonded to the floor and walls using yet more sikaflex 221, and the pipework was connected. At this stage I pressure tested the pipework to check for leaks, as with the lining bonded in place the only future access will be by cutting an access panel. The waste hole was then drilled through the floor using a holesaw, and the panel covering the pipework was permanently fitted in place.
With the shower tray in place, I fabricated the final wall enclosing the bathroom. i left an aperture for the door; sized so that with the door frame fitted, I could maximise the door size whilst minimising wastage from an 8x4 sheet of plywood. The wall was again fabricated from thinwall 25mm steel box section, and was clad, as with the other walls, in 6.5mm birch plywood.
With the bathroom fully enclosed, I coated the lining panels in two coats of epoxy resin, and sealed the shower with yet more Sikaflex 221. Birch plywood is fairly water resistant, but I wanted to avoid the panels molding or delaminating over time. The toilet was then fitted, lining up perfectly with the hatch I had fitted previously to allow access to the cassette from outside. Thetford supply their own door to access the cassette, which comes with the toilet, but in a previous bid to avoid more flimsy plastic shite I had fitted a decent aluminium unit manufactured to size by Vehicle Window Centre.
The sink and cabinet were then installed above the toilet. A superfluous section of flimsy plastic was removed from the top of the cabinet to allow it to fit in the limited headroom inside Jim, the top was then reinforced from behind with more plywood. The sink and cabinet came with no fitting instructions, but screwing the sides into the sidewalls of the bathroom from the back seemed to fix them in place solidly. A bead of silicone was used to seal the join between each of the components
With the sink fixed in place I fitted the tap and plumbed it in place
In addition I installed an extractor fan in the back of the cabinet. The extractor fan is fitted with a switch which allows me to have the fan at a slow or fast speed, and in extract or intake mode. The fan itself is fairly quiet, but being fitted to a piece of plastic the exact width of Higgs Boson particle, the cabinet rattles and drums like crazy with the fan operating, and the sound would be acceptable only to a deaf person. I'll try to stiffen the panel up from behind with (more) plywood when I get a chance.
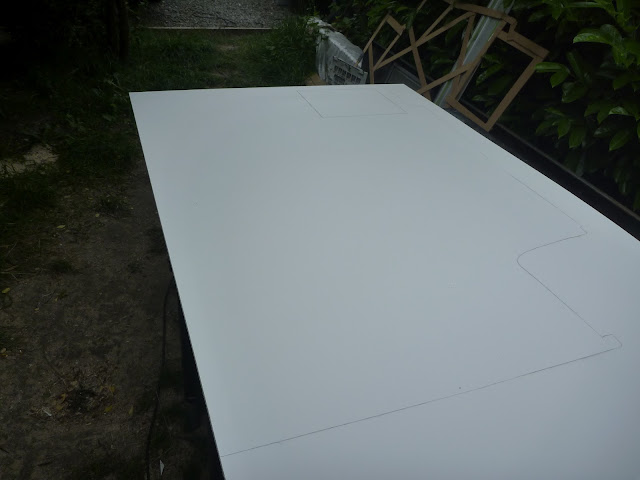
Many people would left the bathroom as it was at this stage. The birch plywood provides a reasonable finish, and with the epoxy coating is fully waterproof. I wanted to avoid any chances of leaks however, and didn't fancy the bare plywood look and so I clad each of the internal walls with a further 6.5mm sheet of laminated plywood. The material is called multiwall and is made by WISA. It is a sheet of excellent quality birch plywood, laminated on both faces with a 0.2mm sheet of lightly embossed polypropylene. It is available in a few colours, but I plan to use white throughout the inside of the truck.
I was aware that polypropylene is a difficult substrate to bond to. It is amongst a group of plastics with low surface energy and I had previously come across a few complicated processes that manufacturers use to make a decent bond to polypropylene components (corona discharge, flame treatment, etc). I knew that epoxy resin wouldn't stick to it as the containers used to mix epoxy are often made from it and it just
peels off when cured, and was not hopefull about using contact adheives. I called Sika for advice and was told that none of their adhesives are specified to work with polypropylene, but that it was worth experimenting with the 221 and 252 tubes I had.
I was resigned to having to abrade the bonding surface of the Multiwall or sand through to the underlying wood if necessary, but I tried a small test piece, bonding multiwall to birch plywood with Sika 221. The bond worked perfectly with no priming or preparation. Using a crowbar to pry the pieces apart led to one of the pieces snapping, leaving cured adhesive attached to both surfaces. With this success I lined each of the bathroom walls, making each piece out of a single sheet to avoid seams and joins where water could enter.
I was resigned to having to abrade the bonding surface of the Multiwall or sand through to the underlying wood if necessary, but I tried a small test piece, bonding multiwall to birch plywood with Sika 221. The bond worked perfectly with no priming or preparation. Using a crowbar to pry the pieces apart led to one of the pieces snapping, leaving cured adhesive attached to both surfaces. With this success I lined each of the bathroom walls, making each piece out of a single sheet to avoid seams and joins where water could enter.
It seems that a glitch in the matrix allowed me to fit the large panel without breaking it into smaller pieces. Sadly the glitch didn't reoccur when I went to remove the panel after I had test fit it with no glue. Consequently I was stuck with the panel in position, with no glue behind it and the edges unsealed. I managed to squirt 2 cans of sikaflex down the back of it by contorting myself into positions which shouldn't be possible. I didn't get the glue exactly where it should be and so the sheet is unsupported in some areas and the edges remain unsealed.
Wishing to continue the teak theme, I used some teak mouldings from KJ Howells to cover the exposed plywood edges around with window. Glued in place with Sikaflex 221 and pinned using headless pins.
My final task for the inside of the bathroom was to install the 1m long LED light I had bought for the job. I had to remove one of the plastic end caps to allow the light to fit within the length of the bathroom. The light is extremely bright and so I tucked it behind the door frame, allowing it to light the room fully , without shining directly into your eyes.
This was the inside of the bathroom completed. I then clad the outside using 12mm WISA multiwall, installed a lightswitch for the bathroom light, and made a door to fit the frame.
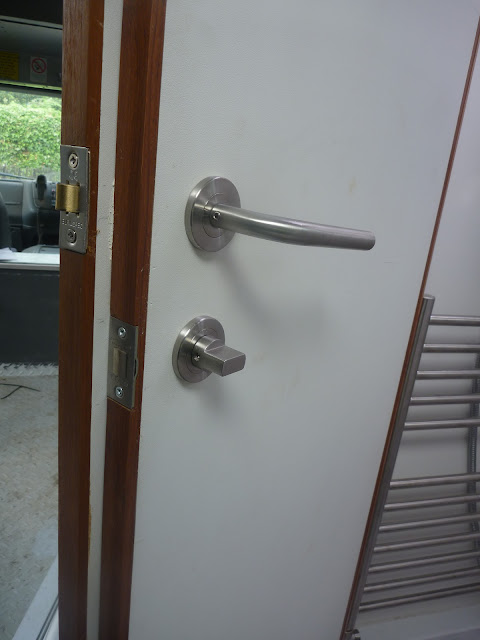
The door is a rather heavy affair, being made from most of a sheet of 24mm plywood, and so I used a continuous hinge down the full length of the door. The door was made in this way as the options for sealing a shower door which opens outwards are limitted. The door is made so that the inside is flush with the frame, reducing the chances of water running down the door and straight out between the gap with the frame . I have installed a sponge rubber sealing strip around the inside adge of the frame but intend to add a second seal to reduce the chances of flooding Jim whilst I'm flailing around in the shower singing Celine Dion classics.
There are a few final jobs to complete: cladding the back wall, connecting the pipework and wiring, trimming around the skylight, etc. But this largely concludes the first big job done on Jim. The work described took about 15 full days of work, during a rare spell of uninterrupted sunshine in London.


Hi Nick, are your windows constructed for houses or by a vehicle specialist?
ReplyDeleteHi, they're from Kellett Windows which specialise in vehicle windows
DeleteWhen planning for a bathroom makeover, there is a lot of things to keep in mind. For example, a bathtub is not just for washing purposes. In a modern bathroom, your preference for a bathtub should be for improving the look and design that can help you to take a highly rejuvenating bath experience. You will have to decide between two major bathtub types that are a single ended bath and a Double Ended Shower Bath.
ReplyDeleteGreat insight! Thanks for sharing your thoughts on caravan toilets. Can anyone suggest me best caravan toilet brands? I am looking to replace my caravan toilets and want something reliable and easy to use.
ReplyDeleteConcealed flush tanks are a hallmark of modern bathroom design, offering a blend of sophistication, functionality, and efficiency. By hiding the bulk of the toilet’s plumbing and providing customizable aesthetics, they contribute to a clean, luxurious bathroom experience. Though they require careful planning and a higher investment, the resulting benefits—in style, space, hygiene, and sustainability—make them an increasingly popular choice for homeowners and designers alike.
ReplyDeletehttps://avahome.pk/product-category/flush-tanks/concealed-tanks/