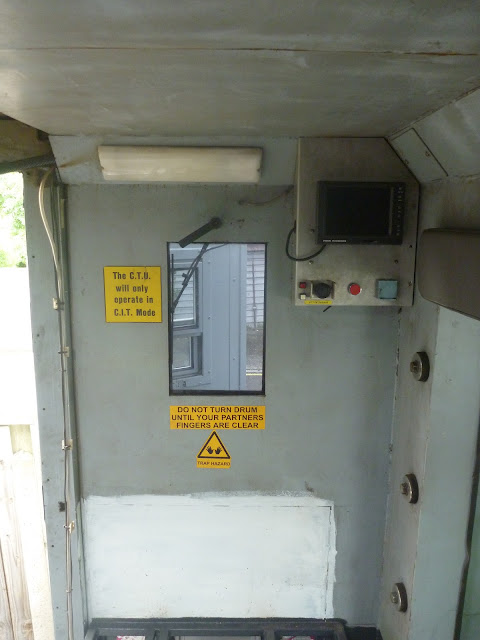
The first job was to remove the existing box. Taking the box off the wall was a fairly quick process, just requiring the removal of eight M6 security bolts (used throughout the truck), but this left me with two pieces of steel angle which supported the box. Drilling the steel at the front of the truck is almost impossible and so, like me, the coachbuilders had taken the easy route of welding the steel supports to the walls. With all of the cables for the cameras running so close, and with both supports being close to the corner, wielding an angle grinder was difficult. I managed to grind most of the welds back, but I still had to spend more than an hour delicately manoeuvring a four foot long crowbar and 4 lb lump hammer getting the steel off the wall. This will probably be the last bit of demolition I have to do in Jim and so there some satisfaction when I had cleaned off the welds and prepared the wall for something prettier.
As you can see on the photo, there is an angled section where both walls meet the ceiling, making a simple box design out of the question. The angled section was fitted by the original coachbuilder to run the cables for the lighting and security equipment, and has now been repurposed by me to run additional cables for high level equipment. Sadly the angled section was not fitted at 45 degrees (actually closer to 50/40), which shouldn't really have surprised me, given that the walls aren't perpendicular to each other, and the walls and ceiling aren't square. The console will largely be held in place with Sikaflex, and so I needed a close fit to all surfaces, this made building the frame for the console a slow process.

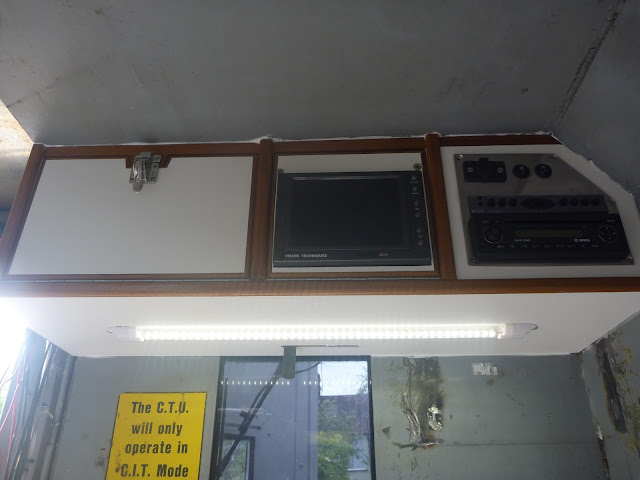
At each stage of the build, the console was offered up to the wall and template was made of the next piece, this was the cut and trial fitted, and if it worked, the console was then taken back to the bench and the new piece was fitted. When the bulk of the frame had been built, I could then start preparing the three sections for the respective purposes: the left compartment being for storage, the centre housing the monitor and video controller, and the right being for a new CD/Radio headunit.

The Wisa Multiwall that I am using again, is prelaminated, which makes my job easier in some respects, but harder in others. In this instance it made the construction more involved and less elegant, as I couldn't drill through external faces as it would leave unsightly screw holes; instead, I used teak battens along the internal joins, screwed into each piece to hold them together and give a larger gluing surface.
As I began working on the right hand section, which will house the headunit and audio crossover, I realised that I would need a large aperture to be able to connect the equipment up; the slot for the headunit is not big enough to get a hand through. It was not possible to make the whole wooden panel removable as it would be wedged in place by the wall cladding and headlining at a later date. I therefore cut a large aperture , and started hacking at a piece of 3mm stainless that was was previously used to cover the lock mechanism on Jim's old steel side door. Drilling the holes for the two switches and 12v power socket was easy, and I could cut most of the headunit and crossover sections out with a thin disc on an angle grinder, but the shorter vertical sections were too small for a 4.5inch grinder, and so I spent longer than I would have liked cutting these out with a dremel. I then polished the piece up and fitted it in place with five M5 T-nuts and sockets screws.
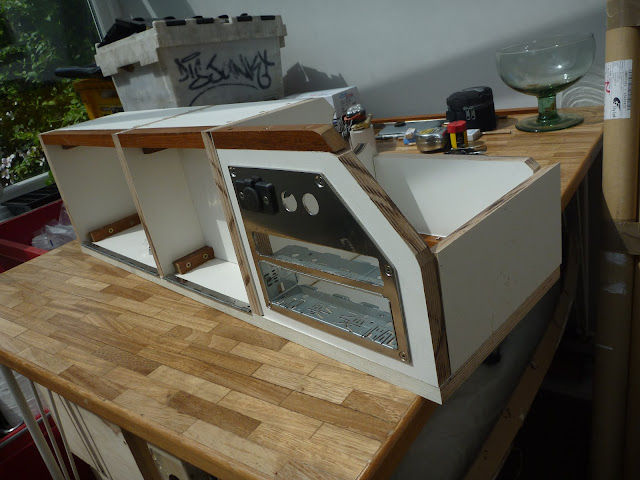
Not knowing how deep Jim's headliner would be, I didn't want to fit a latch mechanism to the top of the left hand storage compartment and find that it fouled on the headliner at a later date. To solve this issue, I added a small drop piece for the latch, and cut the door to fit around it.
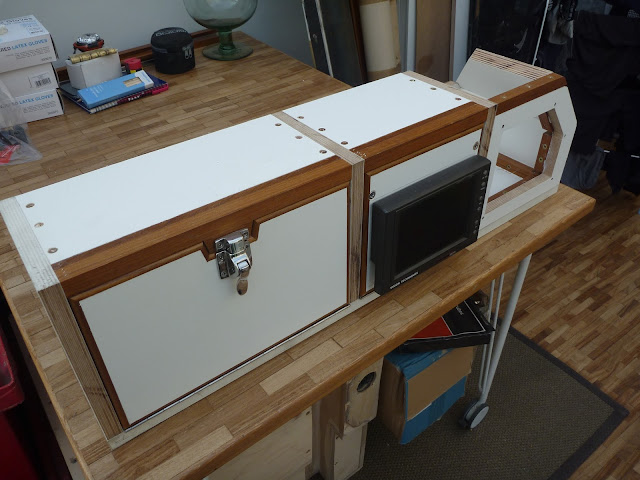
Th final section to complete was the centre section, housing the camera monitor and controller. I had previously fitted a panel, on which the controller could be mounted, and behind which the excess cabling could be hidden, but I still, needed a hinged door on which the monitor could be mounted. Below is how it looked when I first made it.
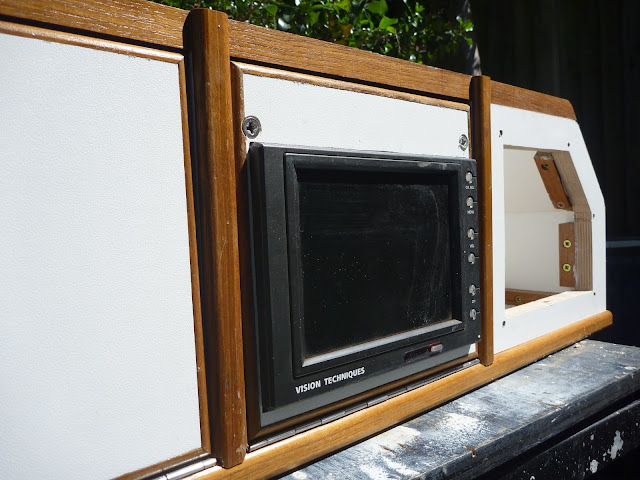
Having spent a considerable length of time building the console, I wasn't happy with how it looked with the monitor sticking out. To make it look tidier, I took the panel off, made a cut-out for the monitor, and fixed a piece of aluminium on which to mount the monitor to the back which I cut from the box which originally housed the monitor.
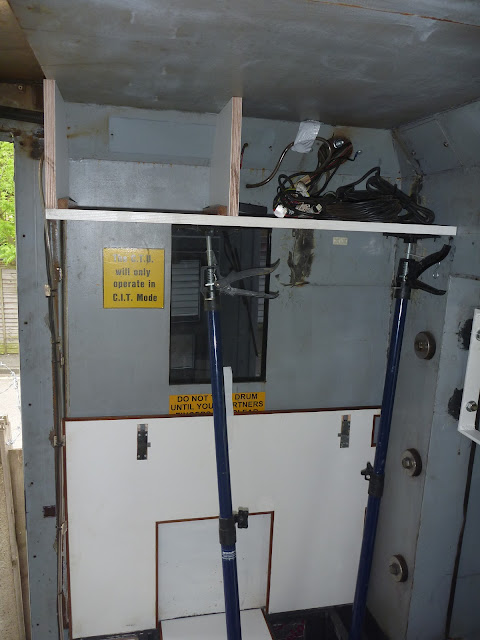
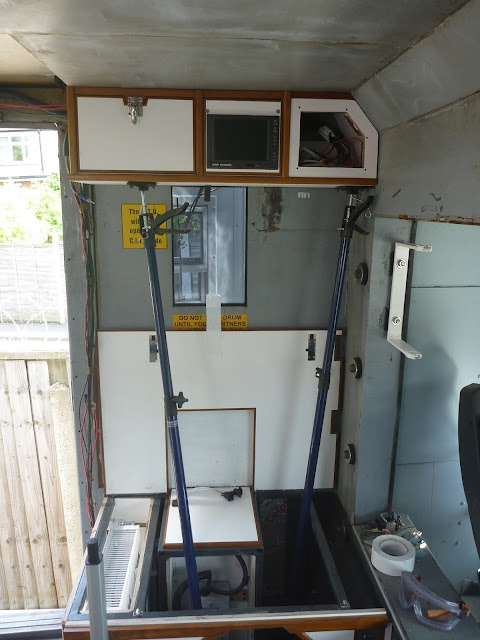
With this complete, I trial fitted the console for the last time, using the dry lining props which have been so useful throughout.
My confidence in the power of Sikaflex has grown throughout the work I've done on Jim, but I couldn't resist the urge to use mechanical fixings too, and so before I glued the console in place, I welded two studs to the walls and drilled holes in the corresponding points on the back walls of the console.

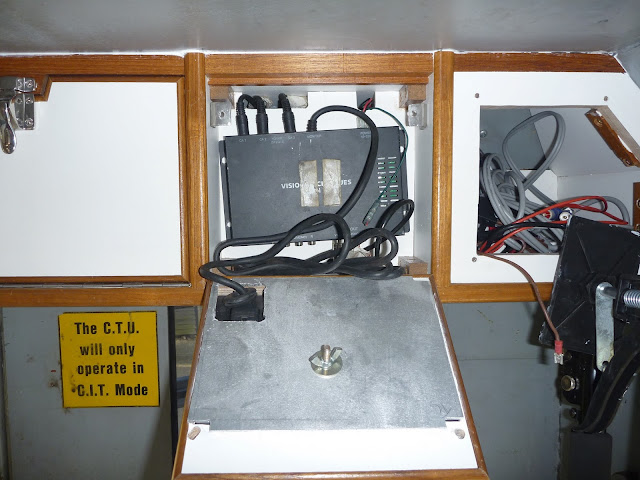
I then fixed the console in place using the two studs and Sikaflex 221, and began wiring the equipment up. I started with the cameras, and simply reconnected them as they were previously in their aluminium enclosure. I got a little disheartened when I went to turn the monitor on for the first time since disassembling the equipment, and found that nothing happened; fortunately I had just forgotten to reconnect the batteries after welding the studs in place. Below is the camera controller before I screwed it in place.
And here's the proof that it works again.
Next I wired the headunit. I had previously tested the dexterity of my fat, bulbous hands making the loom, and just extended it to allow the headunit and sub to be switched with the two rocker switches that I'd mounted on the stainless plate. The wiring was slightly complicated by the fact that the headunit uses 24v, but the crossover uses 12v. Making an ISO loom was a steep learning curve for me and I'm sure I could do it quicker and tidier in future.
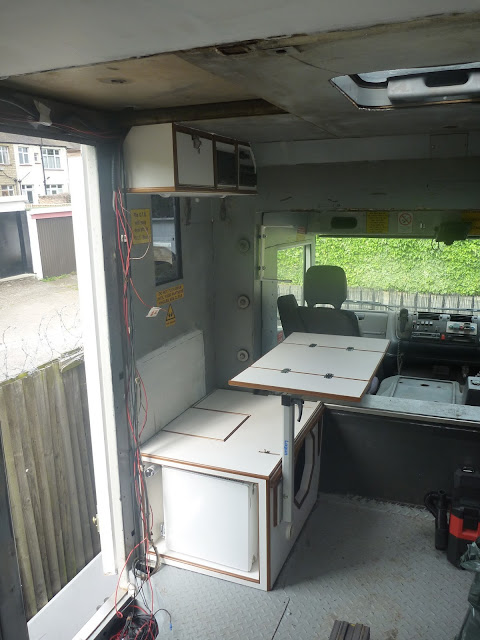
Below is how the console looked when wired and finished. I tested the headunit and wiring and all seems to function well.
The final task was to fit a new light, to replace the fluorescent light that had been covered up by the new cabinet. I used a 600mm 24v Labcraft Apollo light and extended the wiring to allow a switch to be fitted next to the door at a later date.
That concludes a small but time-consuming project.





I stumbled on your blog a few weeks ago and gorged on all your previous posts in one night. Great to see new updates, now you're able to put in the time.
ReplyDeleteI'm in awe of the job you've taken on, and the quality of the thinking and work you're doing to make it all 'just so'.
I'm sure Jim will be a sturdy and faithful steed when you get him finished, and off on to some exotic roads. We had a VW T25 Westfalia pop-top for a few years - so I really appreciate all the touches you're doing to maximise space and comfort in the space you have. Not that I'm one mite bit jealous ;)
I have a bit of a sideways query - but I thought I'd ask since I'm in London too - the reason I stumbled on your blog initially was via a web-search for 'Wisa Multiwall' as I'm hoping to source same for a project on our flat-roofed house. I've tried a few suppliers, but am coming up with nothing when it comes to a relatively small non-trade order- so thought it wouldn't hurt to ask you where you've been getting yours?
Ideally I need it pre-cut to size before delivery as I don't really have the space /means to cut big 1.5 x 1.5 metre panels accurately. Is there anyone that could do both spring to mind? If not - just someone that can send me uncut panels would be good.
Thanks in advance for any help you can offer.
Keep up the good work - really looking forward to the next updates.
Huw
Hi Huw, thanks for the reading! It's nice to know people are interested. I have bought all my plywood from the Advanced Technical Panels arm of Lathams. I have put in two orders with them and neither has been massive; I guess around 10 sheets each. They won't cut anything but they didn't ask whether I was trade or not. I think that they are the main distributor for some WISA's products in the UK. I guess there will be others that sell it but I'm not sure if anyone other than ATP holds stock. Lathams branches stock some of the more common panels but ATP stock the full range.
ReplyDeleteI don't know exactly what your plans are for the Multiwall but it's worth noting that it's not the easiest stuff the keep clean becasue of the surface texture. A smooth faced panels easier to wipe down, but will look a little shinier.
Any local joiners will be able to cut the sheets to size for you but it's pretty easy to do it yourself. I use a Festool plunge saw for the long straight cuts, and for someone like me that doesn't have the space for a tablesaw, it's awesome. Other manufacturers do cheaper versions now, I guess the Makita and Bosch ones will also be pretty good
How many sheets do you need, and where are you? I am planning to order some more in the next couple of weeks and don't mind tacking a few sheets on for you?
Nick
Thanks so much for your reply - and offer of group ordering...
ReplyDeleteI'm beginning to think after what you've said that maybe Multiwall isn't quite what's need though; What I'm using it for is for some partition panelling that separates our flat balcony roof from our immediate neighbours. It's been done in normal ply before but has not been well looked after and has rotted. I thought prepping/painting new ply adequately to be hardy enough for 5+ years of life would be a lot of work so had been looking into coated plys as an lazy-ass alternative.
But I'm thinking that if it's textured then it's not quite what I need - I mis-read the brochure and thought it would be smooth - not unlike the formica you might get on a 60s table (though not as 'hard') or the sort of panelling you see on some kids' playpark equipment. If it's textured, then I think it'd get pretty dirty pretty soon on a London roof. Obs. we could pressure wash it, but low maintenance is the preferred route.
We need to fill 5 exactly square panels of 1.5m x 1.5m in either 15mm or 18mm thickness - from what I could find it's quite hard to find sheet that large. I actually did contact ATP for a quote on Multiwall but they said they didn't carry the 3x1.5m sheets and quoted for a Melanine coating instead.
http://www.advancedtechnicalpanels.co.uk/products/White-Melamine-Faced-Birch-Plywood
But this sounds more like what we need anyway now so, I should get on it. Shaving off a 25mm edge accurately might be quite a challenge though; thanks for your cutting tips - I'm sure they'll be a big help.