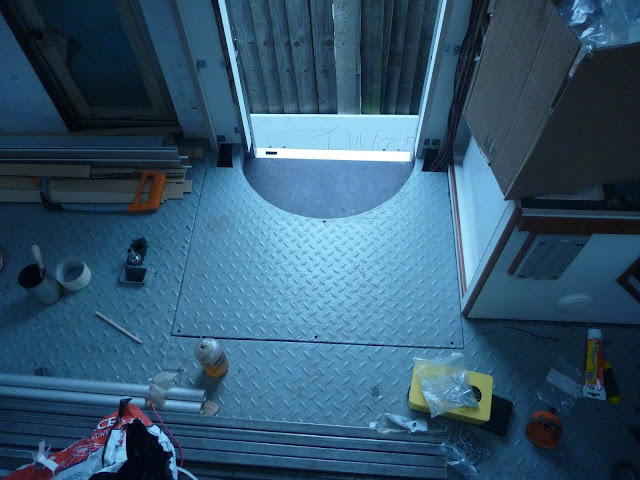
There is a recess in Jim's floor in front of the side door; this was originally installed to house part of the mechanism for the revolving personnel door. There was a heavy steel drum, fitted on a large turntable, which in turn was installed on a sensitive electronic weight sensor. The operator would be weighed on exiting the vehicle and the system would prevent anyone of different weight from re-entering.
All of this equipment was removed, leaving a square recess about 150mm deep. I got a local fabricator to bend a piece of steel to form a semi-circular entry step, leaving a large are behind it empty. I started to prepare the space for installation of the heater by welding four mounting studs.
To help dampen the noise of the heater both inside and outside the truck, I glued a sheet of lead/foam sandwich to the base of the compartment and also to the underside of the lid which will cover the space. I used evostik contact adhesive, although I have reservations about whether it'll be able to hold the heavy sheet onto the underside of the lid for any length of time; if necessary I can weld some studs to the metalwork and use large washers to clamp the sheet in place.

With the space prepared I installed the multitude of cables, hoses, ducts and pipes which link the unit to the diesel, air, coolant and electrical power that it needs. Installing a Webasto Thermo Top is not a hugely complex affair provided you have all of the correct components, but it is time consuming and I spent close to two days on this stage. The first task was to connect up the diesel supply.
A long time ago, I fitted a secondary diesel tank, behind the OEM tank on the offside chassis rail. This tank is primarily to feed the heaters and generator, but with a capacity of close to 250 litres I can syphon diesel out of it to fuel the truck engine in case of fuel emergencies. When I fitted the tank, I connected the generator diesel hoses to the original sender unit, and fitted two independent standpipes for the air and water heaters. I decided not to use the original WEMA type sender unit, instead using a digital tank gauge compatible with the BEP Marine multi-tank monitor.


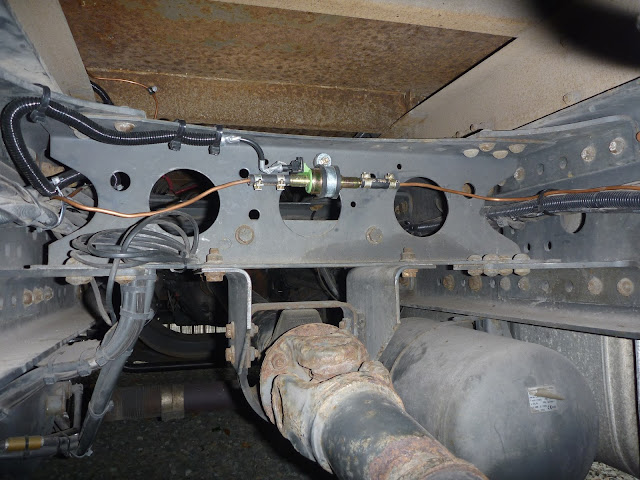
The air heater came fitted with a flexible nylon fuel line, but as the water heater kit I bought was intended for use in narrowboats, it was supplied with a copper fuel pipe to enable compliance with marine regulations. It's no harder to run, but I'm concerned about fatigue cracks as the unrestrained sections of pipe vibrate over time. I ran the copper fuel pipe from the tank to the fuel pump, which I mounted on one of Jim's crossmembers. The chassis flex on Jim is fairly limited, partly due to the very rigid construction of the box and partly due to the heavy duty chassis, and so I'm not too concerned about differential movement between the two chassis rails.

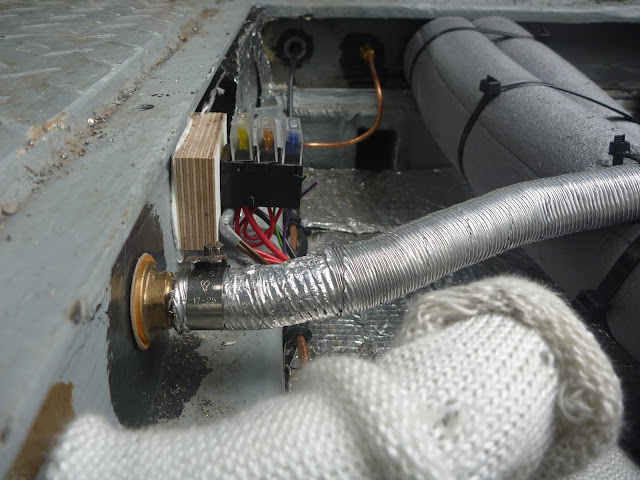
The pipe was then passed into the heater compartment using a standard bulkhead compression fitting.
I then connected up the air inlet duct and flexible exhaust. Both enter into the enclosure by passing a male threaded hosetail connector through a hole in the enclosure, and clamping it in place using a female threaded hosetail connector. The exhaust connector was sealed using exhaust assembly paste which hardens when it heats up.
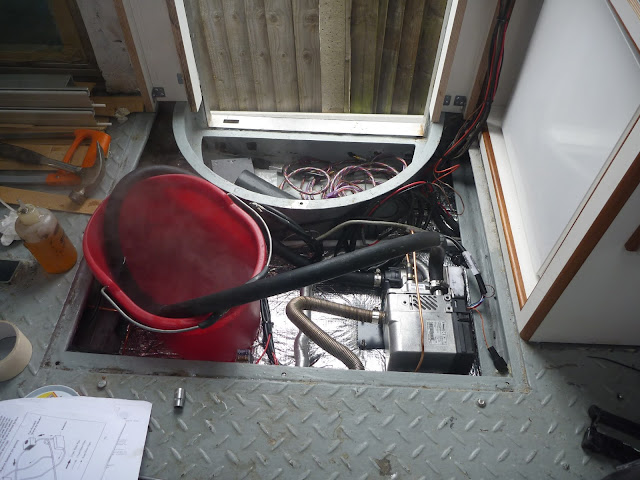
I then connected up the wiring loom, which consists of a power loom going to a fuse box, a timer loom going to the 7-day timer, and the power supply to the fuel pump. By jury rigging a header tank, I then managed to successfully fire up the heater, getting a 5l bucket of water to near boiling in only a few minutes.
With the installation working well, I tidied up the cabling, insulated the flow and return hoses and wrapped the exhaust to reduce heat problems in the compartment.
I then put the lid back on, and will not revisit the Webasto until the remaining radiators, calorifier, header tank and pipework has been installed.


Everybody enjoys the majority of the discussion posts, When i basically encountered, I had desire additional information on that, simply because it truly is brilliant., Having on account of receive distribution. you might need a panel upgrade
ReplyDeleteThank you for sharing such and informative post regarding the Water Heater Installation, this i provide a basic idea to those people who wants to install this type of heaters.
ReplyDeleteIndustrial Water Heater
Visit for gas hot water system
ReplyDeleteWhen it comes to the comfort and convenience of your home, ensuring your water heater repair near me is in top-notch condition is non-negotiable. While some DIY enthusiasts may be tempted to tackle water heater repairs themselves, there are compelling reasons to opt for professional assistance.
ReplyDeleteFor anyone searching for water heater installation in Orlando , it's essential to find a service that ensures efficiency and reliability. Proper installation not only extends the life of your water heater but also ensures optimal performance, helping you save on energy costs. Whether you're upgrading to a more energy-efficient model or replacing an old unit, working with experienced professionals in Orlando ensures the job is done right the first time. A professional installation can also help avoid any future issues, providing peace of mind and consistent access to hot water.
ReplyDeleteWebasto water heaters are a great choice for reliable heating! It's important to stay on top of maintenance. If anyone ever needs expert water heater repair, there are skilled professionals ready to assist.
ReplyDelete