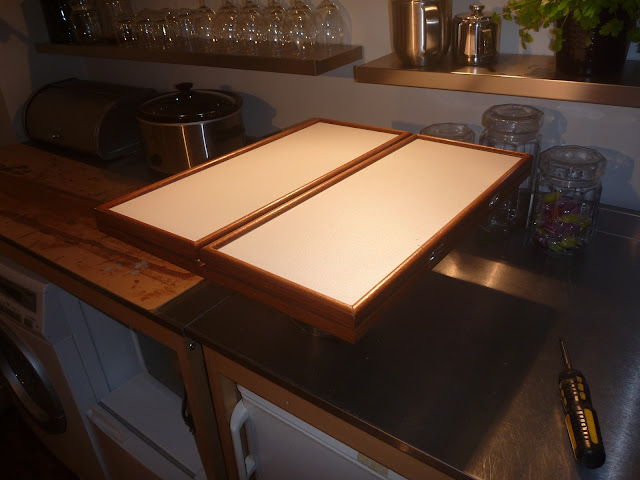
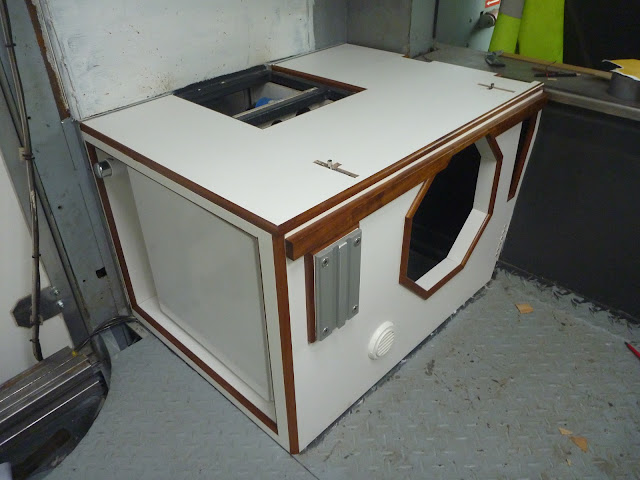
I had a spare few hours so I built the tabletop for the bench I've been working on. The table top pretty much came out as I wanted, but I'm not 100% happy with the hinges; they'll do for now but I may try to improve them in the future.
The problem with these hinges is that they are not designed to take
the weight of the folding table leaf and anything you put on it (such as
elbows). If the hinges take the weight, the leaves bend backwards and
will eventually break, or rip out of the wood.
Friday, 26 October 2012
Sunday, 21 October 2012
Finishing the Nearside Bench Seat
I have recently had a little time to continue working on the nearside bench seat.
Cutting out the Multiwall (laminated birch plywood) to clad the steel framed seat base is fairly quick using the template technique I described in the post on making the bathroom. The slow part has been fitting the edging and trim mouldings. To cover the exposed edges of sheet materials, many people use plastic mouldings and plastic edge trim available from caravan parts suppliers. If fitted well, these can look OK, but I relish making easy jobs complicated and expensive, and so I chose to use hardwood mouldings instead.
If I had wished to walk an even easier path, I could have simply varnished the exposed plywood edges; I actually quite like the look of exposed plywood edges. But in my infinite wisdom, I started using Teak mouldings when I was cladding the bathroom, and not wishing to let parts of the interior let the final finish down, I continued in the same way. If I'd known at the start of this project how many lengths of Teak trim I might use, I would have considered buying a table for my router, and investing in a set of cutters, but KJ Howells have a wide choice of mouldings, and making the mouldings myself would make a time consuming job, even more time consuming.
Friday, 19 October 2012
Public Announcement
Due to increasing number of concerned queries, I would like to make it clear that Jim the Truck is in no way related to Jimmy Savile. Jim absolutely condemns his namesakes behaviour and as a nine year old himself, fully understands the severity of Jimmy's actions.
Monday, 8 October 2012
Jim Gets a New Hat
I decided a while back that Jim needed a roofrack for several reasons, including the provision of:
- a ‘tropical roof’ to shade the surface of the roof
- a suitable frame on which to mount solar panels
- a suitable frame on which to mount an awning
- a platform to store lightweight equipment, and
- protection to the truck’s roof edges from overhanging branches
The tropical roof idea is something I stole when reading Rob Gray's motorhome build diaries, although it is not a new idea. The idea has been used for years on buildings in hot countries, and was used by landrover (called a "safari roof") on their series 1 station waggons in 1956. It is essentially a second roof suspended a short distance above the main roof, keeping the main roof in permanent shade, and helping to keep the interior cool. Rob made his roof in the latest incarnation of his truck by gluing battens to the roof and fixing the covering to these. This would probably have worked fine on Jim, but the roof sheet is not particularly heavy gauge, and at the time of making the decision I was not 100% confident in the ability of the glue to prevent the panels from flying off in high winds. As an alternative I decided that a
roof rack arrangement, attached to the structural steel frame of the roof, was
a good alternative.
The roof of Jim is made up of several sheets of aluminium riveted together, with strips of aluminium overlapping each of the seams. When I bought Jim, his roof leaked badly, and I spent a long time chasing leaks and sealing the large number of rivets and seams along the roof. As a result I was keen not add more holes to the roof, and so I set about planning a roof rack that would be fixed using brackets bolted through the sides of the truck into the steel frame.
The easiest way to get a large solar array on the roof of Jim, whilst providing an effective tropical roof, would have been to use several large (250-300w) panels, neatly filling the available space. The cost to power output ratio of solar panels also improves considerably with bigger panels and so this would also have been the cheapest option. Below is a picture of Emil's excellent Man Kat motorhome for an example of what I would like to have achieved, perhaps with a few less panels.
Sadly, this option was not possible, and so as is usually the case, I had to opt for a more complicated and more expensive solution.
Subscribe to:
Comments (Atom)


