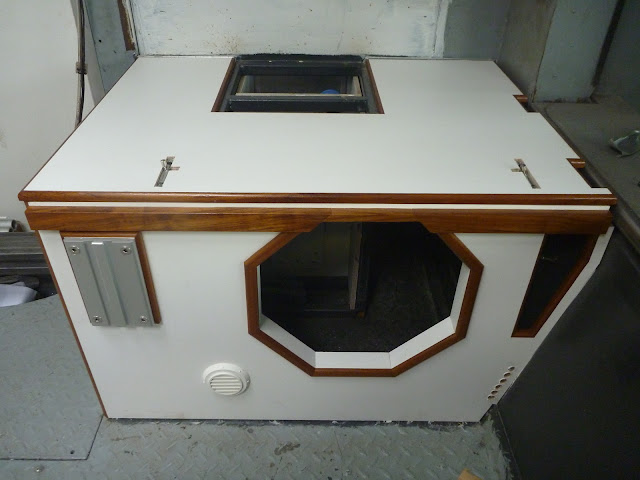
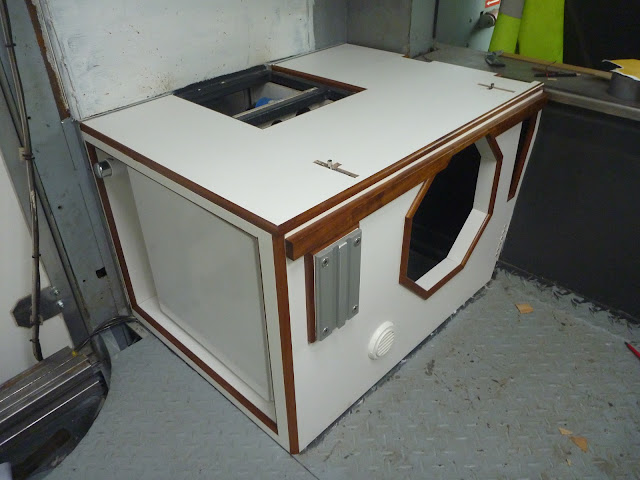
I have recently had a little time to continue working on the nearside bench seat.
Cutting out the Multiwall (laminated birch plywood) to clad the steel framed seat base is fairly quick using the template technique I described in the post on making the bathroom. The slow part has been fitting the edging and trim mouldings. To cover the exposed edges of sheet materials, many people use plastic mouldings and plastic edge trim available from caravan parts suppliers. If fitted well, these can look OK, but I relish making easy jobs complicated and expensive, and so I chose to use hardwood mouldings instead.
If I had wished to walk an even easier path, I could have simply varnished the exposed plywood edges; I actually quite like the look of exposed plywood edges. But in my infinite wisdom, I started using Teak mouldings when I was cladding the bathroom, and not wishing to let parts of the interior let the final finish down, I continued in the same way. If I'd known at the start of this project how many lengths of Teak trim I might use, I would have considered buying a table for my router, and investing in a set of cutters, but KJ Howells have a wide choice of mouldings, and making the mouldings myself would make a time consuming job, even more time consuming.
Teak is a pretty resilient wood, but to improve it's appearance and increase it's longevity it is necessary to varnish the wood. There are undoubtedly new fangled varnishes which dry in 11 seconds and can resist the hammer of Thor, but I like the look of tradional varnishes and trust that in light use (no mythological hammer attacks) I wont have to reapply every 2 weeks. I therefore varnish all the mouldings I am using in Jim with a few coats of satin yacht varnish. I am using the Ronseal brand because it is available everywhere; it produces a good finish, but it needs at least 8 hours between coats, and so takes a while to apply. The instructions on the tin recomend 2 or 3 coats which is fairly optimistic. I would say 3 coats is the bare minimum, although five yields a better appearance.
I quickly learnt that varnishing the mouldings before I cut them and fit them is the least time consuming approach. It is necessary to apply a final coat once the mouldings are applied, but varnishing the mouldings when they are in long staight runs on the kitchen worktop (sorry darling!) is much easier than when they are in short awkward configurations, attached to pieces of pristine furniture.

The rail along the top is to support a piece of plywood which which will enable the benches at the front of the truck to double as a single bed for a guest. The opposite bench will have a corresponding rail.
The aluminium plate on the left is the mount for a swing away table. I had deliberated for some time about how I was going to fit the tables in, as the easiest way into the driving seat is thorough the back and exactly where a table would be. Eventually a came across a swing-away mechanism used in boats; it is manufactured by Noa and is called Lagun. Below is the Lagun mechanism fitted to the mounting bracket; although clearly there is no table fitted on the end of the arm, as I haven't yet had time to cut it out and trim it.
The arm is amazingly rigid, with no play in the mechanism at all, even with a fair weight on the table. The table can be adjusted in all directions and locked in any position, and can even be removed altogether with one turn-handle. I can swing the table out the way when we are driving, to make getting in and out easy, and then fix it in a different position when we are parked. You can buy the mounting plates on their own, and so if I choose to, i could fix a mount outside the truck and use the table outside when the weather is good.
Above is the bench with the lid opened; I'll probably find a more elegant solution than gaffa tape to hold it open. Most of the top panel of the bench hinges back to give me access to the radiator, sub, and amplifier; the middle section at the back will have a fixed panel to seal off the electrical locker from the inside. The sub will have to stay out for a while as I need to run some wiring behind it and it is a pain to keep taking it out and putting it back.
I have also had a chance to test the sub, as the BMS driver arrived from Germany. Having
tested the sub I am pretty happy with the sound. The speaker does not sound exactly as I expected, but it performs well accross most of the intended frequency range, and it's certainly going to make things rattle. There is a bit of a dip in the response at about 80hz which I need to look into but a quick test showed good performance down to 35hz.
I'm hoping that the large cut-out on the right of the bench will be sufficiently larger than the sub ports to not alter the tuning, but testing will tell me. It may end up acting like a tuned bandpass enclosure as the outlet of the ports fires into the area housing the amp, and then exits through the cut-out. The space into which the ports exit is not sealed in any meaningful way so I hope that it wont have a noticeable effect.
I'm hoping that the large cut-out on the right of the bench will be sufficiently larger than the sub ports to not alter the tuning, but testing will tell me. It may end up acting like a tuned bandpass enclosure as the outlet of the ports fires into the area housing the amp, and then exits through the cut-out. The space into which the ports exit is not sealed in any meaningful way so I hope that it wont have a noticeable effect.


No comments:
Post a Comment