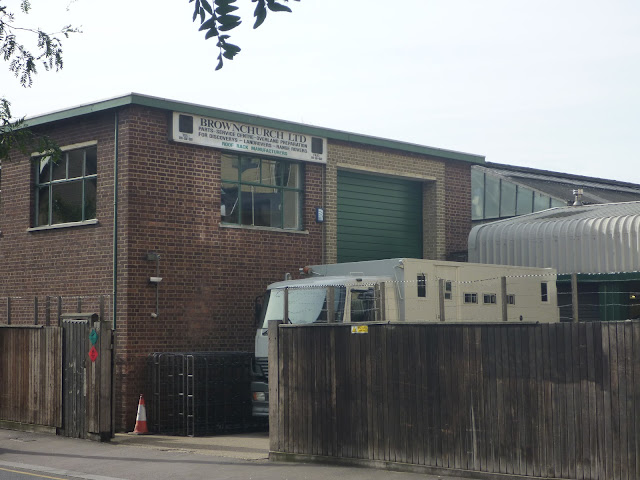
Jim is away for a couple of days and will look a little different when he comes back
Thursday, 20 September 2012
Wednesday, 19 September 2012
Nearside bench seat construction
The latest job I have been working on has been the nearside bench seat at the front end of Jim.
As with most things in Jim, the construction of a seat is not as simple as one would hope. Even for a chronically procrastinating (over) engineer such as myself, I would struggle to spend more than a day or two building a bench seat in my house; however the massively limited space in Jim, means that the bench has to serve several purposes, and consequently I have already invested about four full days in it, with at least one or two more required before I am ready to upholster it.
The offside bench is the longer of the two (the nearside is curtailed by the entry door) but about two thirds of the offside bench is occupied by the leisure batteries, and so there is actually more usable space on the nearside bench on which I have been working. With the prospect of a large empty square box, I quickly decided on approximately 14.23 million uses for the space, several million of which have now been ruled out on the grounds of the lack of space. The key items now using the space include:
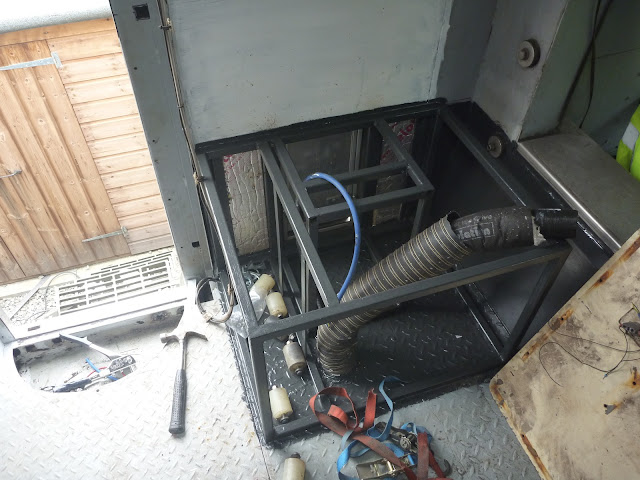
As with all of the major furniture, construction is based around a steel frame, clad in laminated plywood. I built the frame a few months back, but didn't want to order in 1 sheet of laminated plywood as I would have had to have paid for delivery, and so I have had the empty steel frame looking forlorn in the corner for a while. The frame is made from 25mm box section steel; in most areas of the truck I am using the thinnest wall section available (2mm?), but I may fit a seatbelt to this seat and so I used a slightly thicker wall section.
As with most things in Jim, the construction of a seat is not as simple as one would hope. Even for a chronically procrastinating (over) engineer such as myself, I would struggle to spend more than a day or two building a bench seat in my house; however the massively limited space in Jim, means that the bench has to serve several purposes, and consequently I have already invested about four full days in it, with at least one or two more required before I am ready to upholster it.
The offside bench is the longer of the two (the nearside is curtailed by the entry door) but about two thirds of the offside bench is occupied by the leisure batteries, and so there is actually more usable space on the nearside bench on which I have been working. With the prospect of a large empty square box, I quickly decided on approximately 14.23 million uses for the space, several million of which have now been ruled out on the grounds of the lack of space. The key items now using the space include:
- A central heating radiator and the associated flow and return plumbing
- The electrical locker, including power in and out and basic incomer protection
- An air outlet duct from an air heater
- A power amplifier to run the speakers I blogged about previously
- A mounting point for a swing away table , and
- a rail on which to rest a bed base on which guests can sleep (or me when I've been kicked out of the marital sack)
As with all of the major furniture, construction is based around a steel frame, clad in laminated plywood. I built the frame a few months back, but didn't want to order in 1 sheet of laminated plywood as I would have had to have paid for delivery, and so I have had the empty steel frame looking forlorn in the corner for a while. The frame is made from 25mm box section steel; in most areas of the truck I am using the thinnest wall section available (2mm?), but I may fit a seatbelt to this seat and so I used a slightly thicker wall section.
Tuesday, 18 September 2012
Finishing off the bathroom
There were a few outstanding jobs to finish on the bathroom I built recently, which I have now mostly completed.
The bathroom extractor fan was doing a good impression of an aeroplane on the thin plastic cabinet that I mounted it on, and so I fixed a piece of 6.5mm plywood to the back of the cabinet to damp the rattling. I fixed the plywood in place with (more) Sikaflex 221, and used longer mounting screws for the fan which extended into the sheet of plywood. The sound is now much better and with the door of the bathroom closed, the sound is almost inaudible from outside. I didn't take any photos sadly, but if you imagine a square piece of plywood with a circular hole in the middle of it, you'll have a good idea of what it looked like.
The next job was to clad the back wall of the bathroom. Using the same template technique, I cut out a piece of 12mm multiwall and stuck it the steel frame of the bathroom. I then used a piece of quadrant trim to make a nice transition to the side wall of the bathroom.
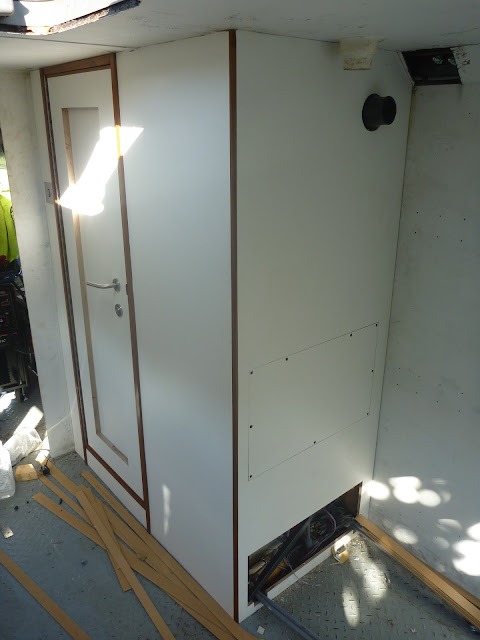
I left two access hatches in this panel, the top one is to access the tap connections and basin waste, in case I need to change the bathroom taps or clean clumps of hair and vomit out of the waste trap. The bottom hatch is to access the connection to the toilet, and all of the elbows and tees for the radiator, shower, toilet and taps. Where possible I will leave access to plumbing connections in case of disaster, but in some cases it will be impractical or impossible. I had intended to make access panels for both hatches, but the bottom cut-out will be hidden in an enclosed box housing an air conditioner, and so there is little value in putting a panel here. In the photo below you can see the plumbing connections for the hot and cold water, and the flow and return to the radiator, and the electrical connections for the toilet and extractor fan.

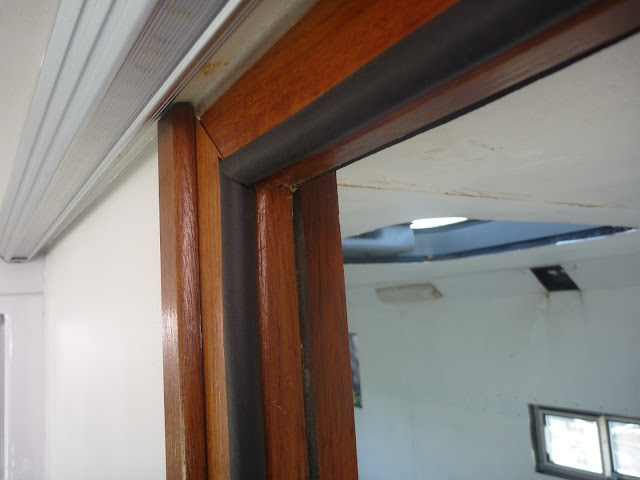
Another job that I finished off was the seal around the bathroom door. The sponge seal I had previously fitted will help, but despite my best intentions, it does not make contact with the door around the whole frame. To further prevent water leaking out of the shower, and to prevent the requirement for a shower curtain, which will inevitably go mouldy and try to molest me every time I get showered, I fitted a hollow bulb seal on the inside bevelled edge of the door frame.
I still have to fit a trap and waste pipe to the basin, and a mirror to the outside of the door, but this pretty much concludes the work on the bathroom.
The bathroom extractor fan was doing a good impression of an aeroplane on the thin plastic cabinet that I mounted it on, and so I fixed a piece of 6.5mm plywood to the back of the cabinet to damp the rattling. I fixed the plywood in place with (more) Sikaflex 221, and used longer mounting screws for the fan which extended into the sheet of plywood. The sound is now much better and with the door of the bathroom closed, the sound is almost inaudible from outside. I didn't take any photos sadly, but if you imagine a square piece of plywood with a circular hole in the middle of it, you'll have a good idea of what it looked like.
The next job was to clad the back wall of the bathroom. Using the same template technique, I cut out a piece of 12mm multiwall and stuck it the steel frame of the bathroom. I then used a piece of quadrant trim to make a nice transition to the side wall of the bathroom.
I left two access hatches in this panel, the top one is to access the tap connections and basin waste, in case I need to change the bathroom taps or clean clumps of hair and vomit out of the waste trap. The bottom hatch is to access the connection to the toilet, and all of the elbows and tees for the radiator, shower, toilet and taps. Where possible I will leave access to plumbing connections in case of disaster, but in some cases it will be impractical or impossible. I had intended to make access panels for both hatches, but the bottom cut-out will be hidden in an enclosed box housing an air conditioner, and so there is little value in putting a panel here. In the photo below you can see the plumbing connections for the hot and cold water, and the flow and return to the radiator, and the electrical connections for the toilet and extractor fan.

Another job that I finished off was the seal around the bathroom door. The sponge seal I had previously fitted will help, but despite my best intentions, it does not make contact with the door around the whole frame. To further prevent water leaking out of the shower, and to prevent the requirement for a shower curtain, which will inevitably go mouldy and try to molest me every time I get showered, I fitted a hollow bulb seal on the inside bevelled edge of the door frame.
I still have to fit a trap and waste pipe to the basin, and a mirror to the outside of the door, but this pretty much concludes the work on the bathroom.
Thursday, 13 September 2012
Jimless interlude
It's been a while since I last blogged, this is mostly because I've been busy enjoying non-truck related things, including very loud reggae at Notting hill, followed by a week on the beach near Lacanau in South West France
I've managed to get a bit of time in on the truck, but I've spent the day trying to avoid vomiting whilst the world spins so I'll do a detailed post tomorrow.
Here's a preview of the progress on the nearside bench seat base, to house a radiator and associated plumbing, an electrical input and output locker and associated wiring, a hot air outlet for an Eberspacher heater, a 12 inch subwoofer and a power amplifier for the sub.
Subscribe to:
Comments (Atom)


